Hardware and Tools in Kindergarten

I’m always thinking of tools I can bring in to the Makerspace for my students to experience, and learn to use. I’ve brought bread knives to use as saws (always using clear and easy to remember rules, and always supervised by an adult), carpenter pencils and pencil sharpeners, tri-squares, mechanical rulers, mechanical tape measures, and levels.

This spring, as we began our supermarket build, I decided to enrich our world with nuts, bolts, machine screws, adjustable wrenches, phillips head screwdrivers and square head screwdrivers. When my students entered the Makerspace and noticed the new things sorted into our maker-trolly, they immediately began experimenting, asking questions, and sharing thoughts.
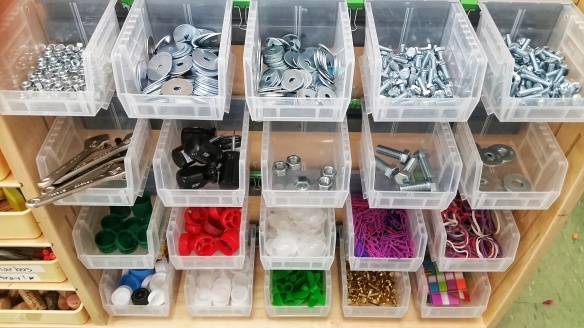
20180403_161737-01

Not all of them knew what the wrench was, or how to use it. I quickly swore those who knew how to use the wrench, to strict secrecy. I told them they had to keep it a secret for one week. If by Friday, the others hadn’t figured it out, they could teach them. But, until then, they had to let the others use their big beautiful brains and experimentation to discover it on their own. Many figured it out, and any that didn’t were happily taught by those in the know.

They loved using the tools and the hardware. Sometimes they would put the bolts/screws, washers, and nuts together using their fingers as the tools, at other times, they used the wrenches and screwdrivers. Our first foray into using them in the build was when they realized they could plunge the bolts/screws into the foam shelf they had created.
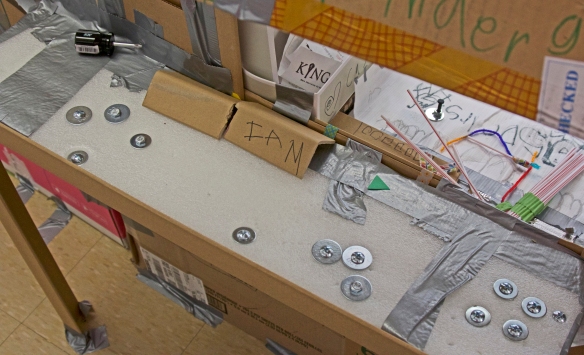
foam shelf

This required me to help them because the foam as actually a bit too thick for the size bolts/screws I had purchased. Cognizant of how impossible it was for them to succeed at this task on their own, I began thinking of specific projects that didn’t require so much help from me.

I came up with two.

The first  was an art project. I thought creating people with articulated arms and legs would be a fun way for them to learn about the nuts, bolts, and washers. It required a good bit of thinking, risking, imagining and creating as well as significant manual dexterity and work.
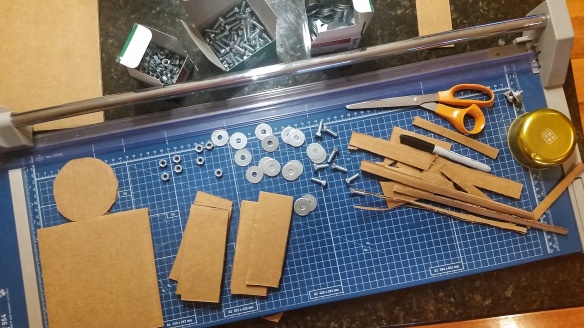
20180418_193737-01

We talked a bit about how to use the hardware, and what was possible because of it — movement, and tightening the arms and legs into particular positions. We also discussed the possible pitfalls — poking yourself with the pencil that you used to make a hole for the bolt, making the hole too close to the edge thereby ripping the cardboard piece, and putting the bolt on backwards which would make hanging it darn near impossible because it was too far from the wall.

They were fantabulous workers, thinkers and creators! They were careful about positioning their holes, and making them. They persisted — counting out their hardware, changing bolts if they put them on backwards, and taking the time needed to accomplish their personal visions for their people.
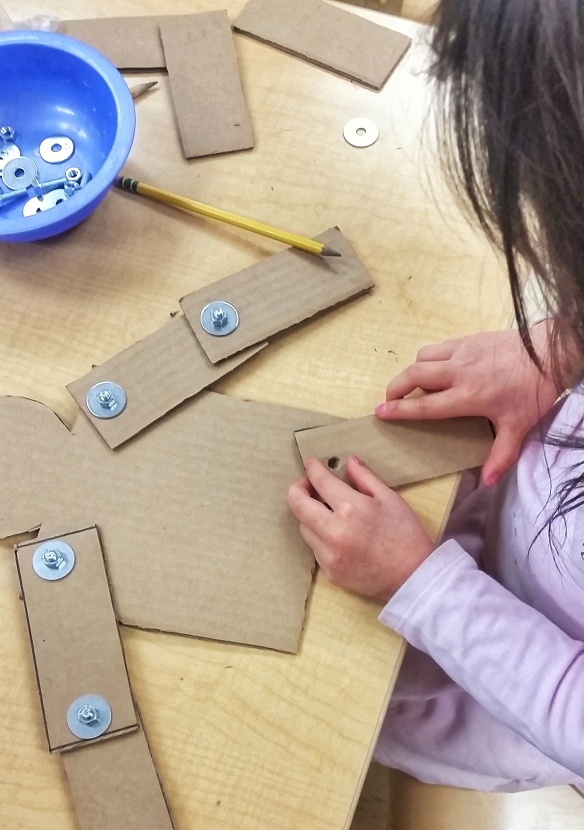
20180419_131350-01

And gosh, did they imagine and create! Mothers with babies, a girl in a tuxedo, Draco Malfoy, girls with 3-D curly hair, a baby sucking a binky, and designer boots are just a bit of what they did.
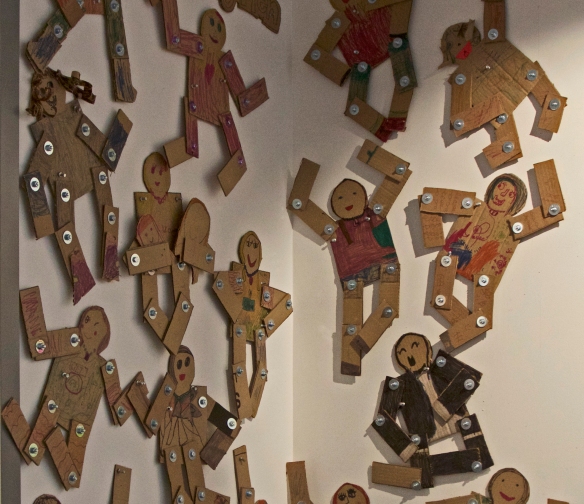
Here are some of their people hanging in our art gallery:
 cropped dolls

The second project was creating sturdy shelves for the supermarket. By now they were pros at using the tools and hardware. With intensity and proficiency, they worked together to secure the shelves to the boxes. One climbed inside to install the washer, and tighten the nut. Another worked from the outside, holding the bolt in place to allow it to be tightened.
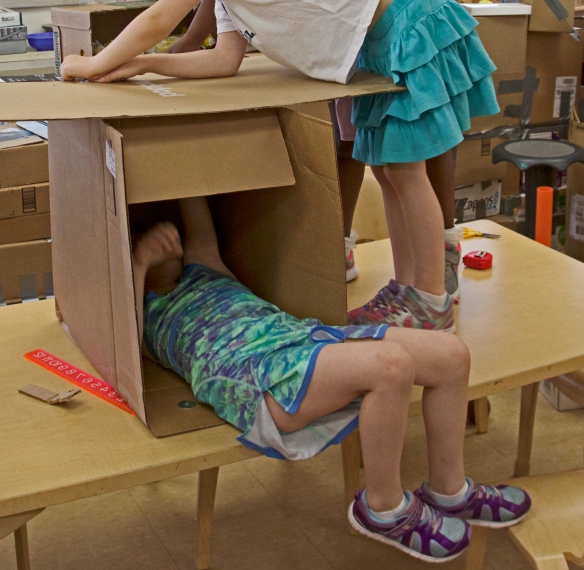
shelves

Meanwhile, the girls developed their own use for the tools and their skills. I loved all they thought of doing.

As they played with the hardware, they discovered many interesting configurations outside the normal purview of nuts and bolts. One presented me with this:
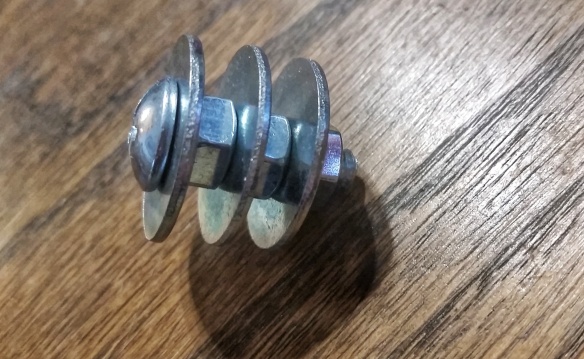
20180522_070340-01

Me: “Thanks! What is it? How do I use it?”

Student “Well, it could be jewelry … (significant thought) … or it could just be a fun              rolling toy!”

Me: “Indeed it could! I love it.”

Finally as they progressed even further in their comfort with the tools and hardware — and their belief in themselves as capable of doing anything necessary with them —  they enlarged their scope of projects. Seeing me unboxing two new sensory tables, one of my girls noticed the bolts, nuts and washers.

Student: “What’s that, Miss James?”

Me: “New sensory tables.”

Student: “What are you doing with them?”

Me: “I’m going to put them together.”

Student: “I can help!”

I love that she declared her ability to help. She didn’t ask! She knew I would accept help, so she just jumped in as my furniture building colleague! It was awesome!

I am particularly fond of this photograph as it captures the truth of the moment. The tip of the sneaker in the left hand corner is mine. I like that it indicates my presence, but the hands holding the tools are the hands of a 6 year old girl! That is one empowered girl!!!
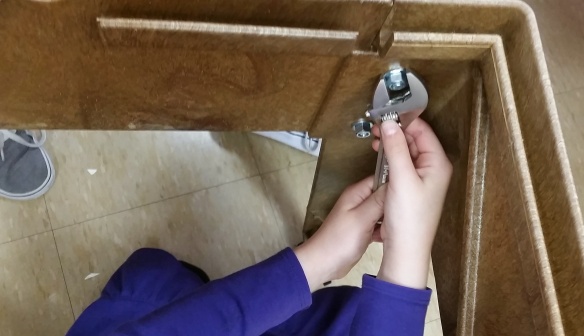
20180430_143905-01

“Rock on with your fantabulous self, my girl. Rock on!”

Conscious Ink

My diagnosis anniversary date is December 16. My feelings each anniversary are a combination of positive and less-than-positive emotions. I notice, acknowledge and feel the sorrow and other less-than-positive emotions, but I highlight and emphasize the positive emotions by celebrating!

In the past I have dyed a fuchsia streak in my hair with kool-aid, distributed glitter, and shared sparkly temporary tattoos. This year I decided to continue the temporary tattoos, but wanted to find the perfect tattoos. After some searching, I found Conscious Ink.

Here’s the first paragraph from their site “Can a temporary tattoo leave a lasting impression on our disposition? Solidify our intentions and affirmations? Make a permanent mark on the world? Crazy as it seems, Conscious Ink founder Frank Gjata says yes! Conscious Ink is on a mission is to spread love and raise consciousness around the world, one body at a time!” lol! HOW AWESOME IS THAT??!?!

I looked at their many offerings and chose 3 that spoke to me.

  • Breathe
  • Be brave
  • Anything is Possible

Great messages, right?!

I eagerly awaited my package. It made it to me the day before my anniversary. YAY!!

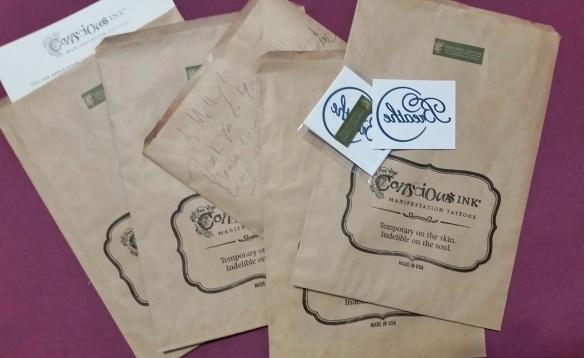
I wasn’t disappointed when I opened the package and examined the stash. Everything had such beautiful spirit, joy, humor AND creative thinking

20161229_123009-1-01

The tattoos themselves are great (non toxic, safe, made in the USA), but, the instruction card that comes with them pushed them over the edge into fantabulous! lol. As I read it, and followed the instructions, I chuckled to myself thinking “Wow, this is some cool creative thinking!”

I don’t know what “How might we …?” questions Frank and his team asked themselves, but here’s one I thought they must have considered.

How might we infuse each aspect of the temporary tattoo experience with mindfulness, intention, joy and good energy?

I laughed out loud – not making fun, but from surprise and enjoyment – when I read their instructions for the actual tattooing. As with most things, temporary tattoos don’t just magically happen. There is a process, and it includes waiting. Waiting is sometimes a drag, or something we endure and hope away, rather than experience with mindfulness and purpose. Not so, the Conscious Ink people.

What do they say? “Patience is a virtue.” LOL! That still makes me laugh out loud. They suggest you take the time to think about what it is you want to manifest. I love that!!! Take those 30 seconds or more and be present. Think. Breathe. Have the thoughts (joy, gratitude, hope) and do the things (breathe, celebrate) that were the reasons you chose your tats.

I followed the instructions – patient, mindful, purposeful being, instead of just waiting. It was a lovely 30-60 seconds. I am going to have my K students do this when I share the tats with them in January. I may even have them join in some writing about their tattoos and intentions. We shall see.

I am impressed with the thought and creativity of Conscious Ink. It enhanced my temporary tattoo experience. But, it’s also a wonderful reminder to me of what can be accomplished when we approach our work and life with purpose, intention, humor, joy and creativity.

By the way, Frank has some other nice sites (and by nice I mean pretty cool, awesome, fun etc. etc. etc.) worth checking out. They seem to all be linked from his website Blississippi. Give them a look if you have a moment.

And always remember … Breathe … and be brave.


Engaging in the Hard, Fabulous Work of Creativity

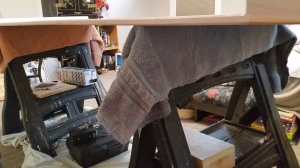
My bathroom has two sliding doors. I designed the bathroom with these doors as canvases for some sort of artwork. Finally, one side of one of the doors is finished!!! Well, to be specific, the artwork is finished,but the door remains perched on two saw horses in my bedroom/studio, waiting for a few coats of polyurethane before it is hung again on its slider.

.door on saw horses

It is remarkable how much thought, research, doodling, re-thinking, kibitizing, talking, looking, and physical work, are involved in being creative! I love the process, but for some reason, this project really encouraged me to notice the time, effort, thought and work of creativity.

My process:

  1. I spent days thinking about the project. I imagined what I wanted. I thought about how I might achieve what I wanted. I changed my mind numerous times. I decided I wanted to — somehow — stay true to the architectural design of my arts and craft bungalow home.
  2. This sent me on a long path of research – looking up arts and craft fonts, flipping through a plethora of arts and craft design and art books, and googling various people and pieces I was particularly drawn towards.
  3. I found two fonts, and many designs I liked. Now I had to see if I could actually use them. Could I learn how to draw them and make them my own?
  4. Next came the doodling and sketching. Funny as it may sound, I experience joy when I find and use a pencil that feels good in my hand, moves smoothly across the paper, makes great marks and erases easily. And speaking of erasing, the number of iterations I went through in order to come up with the final design, was amazing! I wish I hadn’t thrown away all my sketches. It would be good for my students to see and know that the work that looks so easy, and causes them to say, “Wow, you are so good at that, Miss James!”  is actually informed and supported by many other tries! I’ll be sure to keep the next batch.
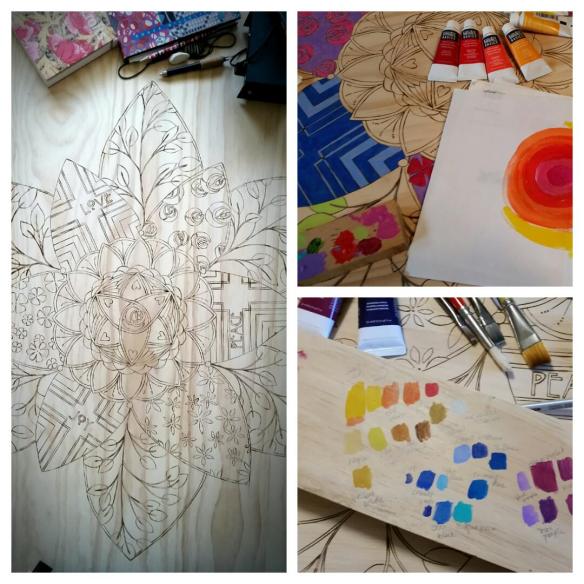
  5. My final design is the result of being open to possibilities wherever I found them, and mashing together ideas from many different arenas – arts and craft designs, zen-tangling sensibilities, yoga, mandalas, nature, botany, math, color theory, and I’m sure many more that I’m currently forgetting!

door collage

But that wasn’t the end! The work, thinking, experimenting, ideating and iterating continued.

  1. Now I had to take my idea  – drawn on an 8.5 x 11 piece of paper – and transpose it into something beautiful on the actual door. Rulers, yardsticks, lovely pencils and erasers, compasses, and scratch pieces of paper were purposefully strewn across the door. I measured, sketched, thought, looked, breathed …. and did it all again for some time. It was fabulous! Finally the design was sketched onto the door.
  2. Next was the wood-burning stage which would create the dark lines of the design on my door. I should mention that this stage was also preceded by many hours of practice. The burner comes with many different tips. I experimented with each one to see what type of line it created, which heat worked best for it, and how easily I could manipulate it to create the lines I wanted. I experimented on various types of wood – they all seem to burn differently – and then explored the different areas of the clear pine I was using. The grain caused different burning rates and necessitated changes in speed and heat.
  3. Finally, time for color! I loved the look of the design burned into the wood. I’m sure it would have been fine to polyurethane it in its natural form, but I had created it with color in my mind and knew it would seem unfinished if I left it uncolored. So, once again, I risked “wrecking it” in order to make it what I knew it could be.
    1. I laid the colors out on the design – playing with different combinations.
    2. I painted the colors onto a similar piece of wood. I was amazed by the difference in the colors out of the paint tube versus on the tube.
    3. I thought, looked and waited. Mostly the waiting was because I was working during the day and coaching in the evenings, leaving me little time to create. But, that waiting was important, because I had time to look, and look some more, and allow my brain to play with the colors.
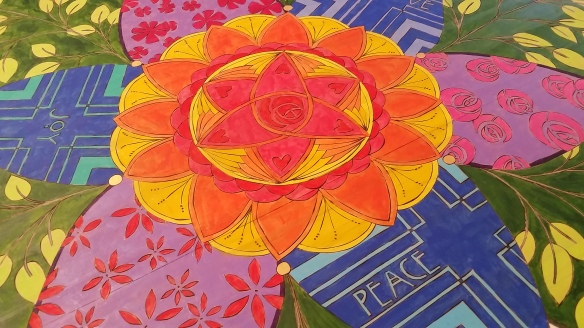
    4. I couldn’t decide on all the color combinations so I started with one color combination – the leaves – and as I painted, the other colors combinations coalesced for me.

The color and painting process was fascinating! I tried to figure out the entire color scheme, but failed time and time again. When I stopped trying and began painting, I – for lack of a better phrase – began to see better. It was as though the process of immersing myself in the medium – the paint and the painting – increased my clarity.

I can’t explain it — many ways it was magical! As I painted the leaves, with the tubes of paint lying about me, and I would notice myself thinking “Oh! That might work.” I’d continue painting, and notice another thought “Hmm, perhaps that is too much. I think this might be better.”

Often I’d run my ideas past my brother (another creative, learned soul) for clarification and validation. I wouldn’t always use his ideas, but somehow his ideas fed mine and helped them become more “perfect.”

door closeup

Each step in the process involved risk, flow, joy, time and triumph. It was all fabulous, but the time was really important. Time to think, to do, to wonder, to mess up, to re-think, and to experience the process, the product, the materials. I would often just stand at my work – leaning on the door, examining it with my eyes. Other times, I would run my palm over the work. The tactile experience of touching my work in its various stages of completeness was incredibly important, necessary and satisfying.

It makes me think about school and my students. How can I help them have this experience of creativity — in all its angst, sweat and splendor? How can I give them the time and opportunity to experience — in their own creative work and thought — what I experienced in mine?

I’m not completely sure, but rest assured I’ll be thinking about it, and letting the question, and any possible answers, inform my teaching practice!